Budget Byte’s Cheddar Grits Breakfast Bowl

“Stick with me, kid, and you’ll never need to fight off the weekend brunch crowds again”

Beth, Budget Bytes
Shelby’s Grit bowl with Smoked Gouda, Egg, Salsa, and Scallions.

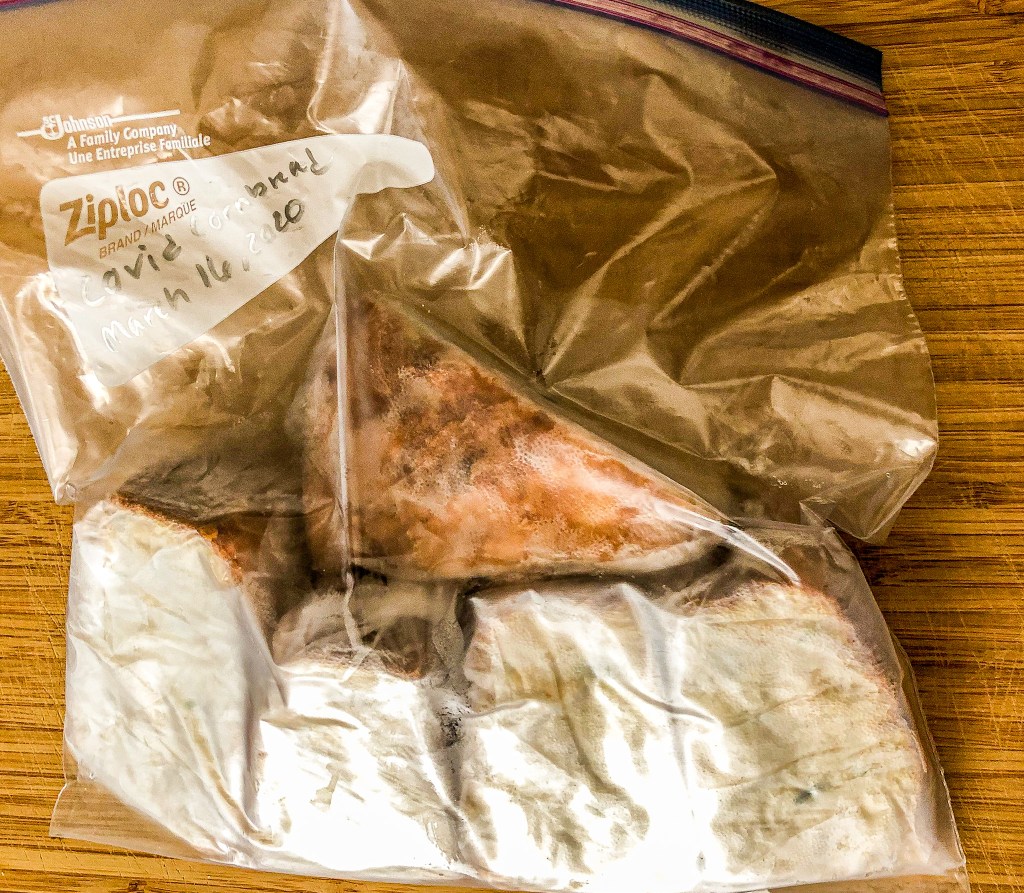
In the midst of the Covid Pandemic, I’m testing out new breakfast foods everyday as a fun way to start the day at home. Today’s breakfast was a real treat from Budget Bytes: Cheddar Grits Breakfast Bowl. I’ve had a similar dish while out at brunch, and fell in love! Being able to recreate it at home was a nice surprise. It is a pretty easy recipe, cheap to make, and only uses a small amount of ingredients. It is also a good pantry meal for future reference!

Let’s Get Cooking

Homemade grits have been something I struggled with in the past. Looking back, I might have been cooking the grits at too high of a temperature for too long, adding too much liquid in the beginning, or maybe adding too much fat (butter) at the beginning.

Needless to say, Beth’s recipe was simple, and easy to follow. I believe following this recipe will lead to full-proof fluffy and creamy grits every time.

There were two things I changed about this recipe. The first being that I only had 2% milk at home, and venturing out to the store for whole milk right now, would prove to be fruitless (hello pandemic level empty grocery stores near me). I moved forward with the 2% and it turned out just fine. Typically if a recipe calls for whole milk, it’s for a reason. The dish probably needs more fat to cook properly. I was a little nervous moving forward with 2% milk, but it worked out great!

The next thing I changed was using smoked Gouda cheese instead of cheddar. Why? Because: IT. IS. DELICIOUS. Remember the version I had at brunch that I mentioned? Well it was made with smoked Gouda cheese. MMM!

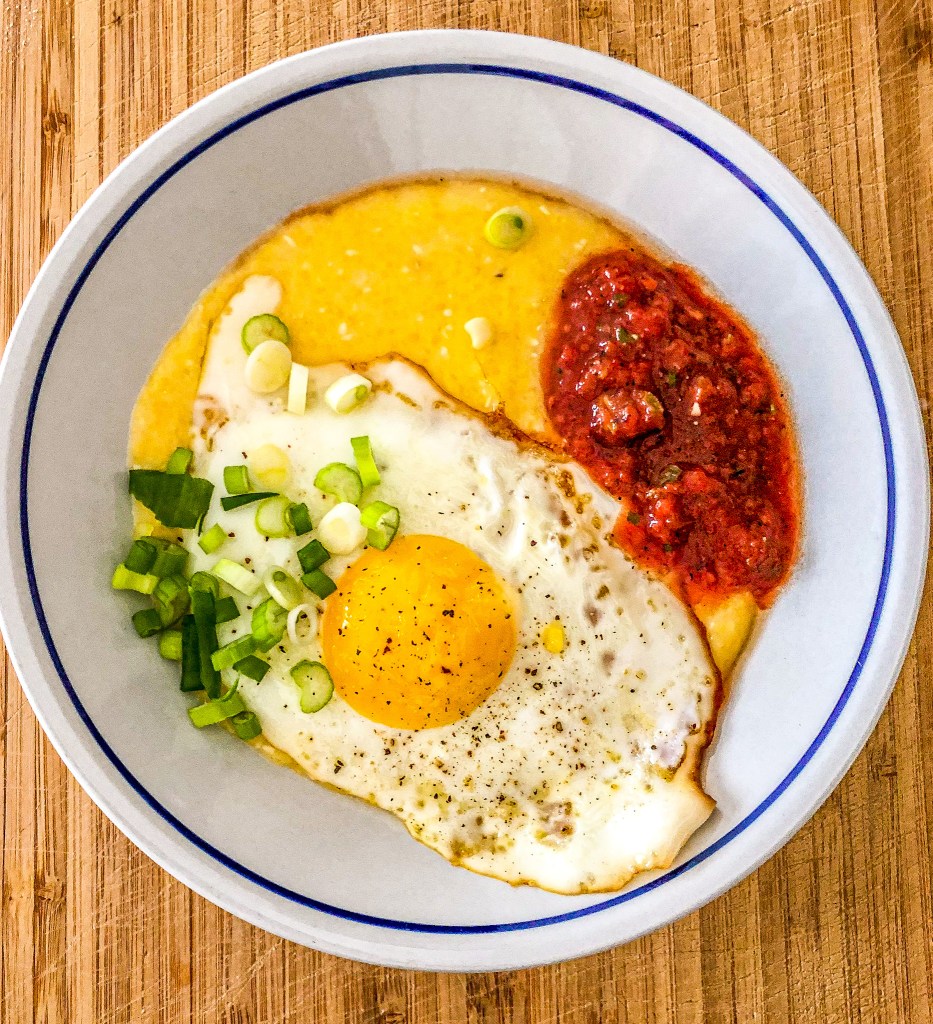
The one thing I would change is the type of salsa that is used. I grabbed some that I pick up from the farmers market to place on top, and it was too much flavor on top of the grits and egg. Next time I would make my own pico and use that as the salsa instead. It would still add flavor without over powering the bowl.

Overall I was very happy with this recipe and I believe anyone else would be too. Bon appetit!


Cheddar Grits Breakfast Bowl

INGREDIENTS

  • 4 cups water
  • 1 tsp salt
  • 1 cup quick cooking yellow grits*
  • 2 Tbsp butter
  • 1/2 cup whole milk
  • 4 oz medium cheddar, grated
  • 4 large eggs
  • 1 cup salsa
  • 4 green onions, sliced
  • Freshly cracked pepper

INSTRUCTIONS

  • Add the water and salt to a medium sauce pot. Place a lid on top, turn the heat on to high, and bring the water up to a rolling boil. Once boiling, stir in the grits. Turn the heat down to low, replace the lid, and let simmer for 5-7 minutes, or until thickened.*
  • Add the butter and milk to the grits and stir until the butter has melted and the grits are smooth. Stir in the grated cheddar, one handful at a time, until fully melted in and smooth. Leave the lid on the pot with the burner turned off to keep the grits warm.
  • Cook four eggs using your favorite method (fried, scrambled, soft boiled, etc.). Slice the green onions.
  • To build the bowls, place one cup of the cheddar grits in a bowl, top with one egg, 1/4 cup salsa, some freshly cracked pepper, and a sprinkle of sliced green onions.

NOTES

*Make sure to check the directions on your package of grits. Every brand is a little different and they may require a different cooking time or method.


Let me know how the recipe turned out for you in the comments below!

Cook’s Country Jalapeno-Cheddar Cornbread

“Making cornbread from a box is easy, sure, but it is also limiting. Making cornbread from scratch really isn’t much harder, and it opens up a vast world of cornbread varieties, including adding spicy jalapeño chiles and cheddar cheese.”

Cooks Country
Shelby’s Jalapeno-cheddar cornbread!

In the midst of the Covid Pandemic, I’ve decided to take up freezing food. Freezing food has never been a habit of mine, but with the time at home that I have, I’ve decided to learn the tricks of the freezing trade. I started reading Budget Byte’s Freezer guide, found cornbread was one on the many foods that is easy to freeze, and immediately decided to make it.

Although, I am calling it Covid-Quaran-Bread/Covid Cornbread for now.

Freezer Notes

Covid Quaran-bread!

The first and (supposedly) most important thing I learned from reading through several different freezing do’s and dont’s is to label when the food was made (i.e. Covid Cornbread 3/16/20)). The reasoning was because at best, the food is only good for 3 months in the freezer.

The second most important thing I learned is to let the food chill completely (ideally overnight) in the fridge before placing in the freezer to avoid freezer burn.

Let’s Get Baking

Cornbread truly is simple to make. I succeeded with this recipe even though I decided to add 3/4 cup of actual corn kernels. It was an absolutely delicious “loaf?” and I can’t wait to eat it again when I bring it out of the freezer.

One of my favorite aspects about this recipe is that even though it calls for whisking the dry ingredients separately from the wet ingredients, it wasn’t actually necessary. I made everything in the same bowl and it came out perfectly.

There were two things I changed about this recipe. The first being that I only diced 3 jalapenos instead of 4. Not sure if the recipe calls for 4 jalapenos in case the jalapenos themselves are smaller, but the three I had were roughly medium-sized. You can tell in the photo that there was plenty of diced jalapenos throughout the bread. So, all that to say, use 3 or 4 at your own discretion.

The next thing I changed was adding 3/4 cup frozen corn that I defrosted. The corn addition didn’t change the batter nor end result from what I can tell. I chose 3/4 cup to match the same volume of jalapenos. If you wanted to add corn, I believe you could go all the way up to 1 cup of corn to add. Depending on how much you love corn.

My absolute favorite thing about this cornbread is the 1/2 cup cheese layer on top of the bread. The cheese added a nice, nutty crust to the top of the bread that you don’t normally see.

Happy freezer-friendly cooking during this super weird time!


Jalapeno-Cheddar Cornbread

INGREDIENTS

  • 1½ cups (7½ ounces) yellow cornmeal
  • 1 cup (5 ounces) all-purpose flour
  • 2 tablespoons sugar
  • 1½ teaspoons baking powder
  • ½ teaspoon baking soda
  • 1½ teaspoons salt
  • 1¼ cups whole milk
  • 2 large eggs
  • 6 tablespoons unsalted butter, melted
  • 6 ounces extra-sharp cheddar cheese, shredded (1½ cups)
  • 4 jalapeño chiles, stemmed, seeded, and minced (¾ cup)

INSTRUCTIONS

Adjust oven rack to middle position and heat oven to 400 degrees. Grease light-colored 9-inch round cake pan, line with parchment paper, and grease parchment.

Whisk cornmeal, flour, sugar, baking powder, baking soda, and salt together in large bowl. Whisk milk, eggs, and melted butter together in second bowl. Stir milk mixture into cornmeal mixture until just combined. Stir in 1 cup cheddar and jalapeños until just combined. Transfer batter to prepared pan, smooth top with spatula, and sprinkle with remaining ½ cup cheddar.

Bake until cornbread is deep golden brown, top is firm to touch, and paring knife inserted in center comes out clean, 35 to 40 minutes, rotating pan halfway through baking. Let cornbread cool in pan on wire rack for 10 minutes. Remove cornbread from pan, discarding parchment, and let cool completely, about 1 hour. Serve.


Let me know how the recipe turned out for you in the comments below!

Pinch of Yum’s (Vegan) Crunchwrap Supreme

“I have a new obsession and YOU ARE LOOKING AT IT.”

Lindsay, Pinch of Yum
Shelby’s crunchwrap supreme!

It has been YEARS since I’ve had a crunchwrap supreme, but thanks to Pinterest, I came across a vegan version. Pinch of Yum was kind enough to also film a recipe video for the making of this delicious treat which was very helpful, especially for the additional tortilla to cover the wrap.

HOT (but not-so-subtle) TIP, for those who are meatatarians, feel free to use the regular crunchwrap recipe.

I made this recipe twice and the first time I had a huge problem with closing the wrap. I ended up sticking a bunch of toothpicks around the wrap to keep it together when I flipped it over the open side.

To be honest, I still had the problem the second time with the first crunchwrap I made, but a little trick happened unintentionally with the second. We have “plate bowls” which are (depending how you look at it) plastic plates that have a tall side or really wide bowls. I placed the burrito shell in the plate bowl before adding the fillings, and it immediately created a “mold” for the ingredients to become more snug within. Since the filling fit better, it was so much easier to close.

When making this recipe, I decided to skip buying tostadas and used thick round tortilla chips instead. I think this worked out perfectly because the size of the tortilla chips can be smaller which make it easier to close the wrap.

I didn’t follow this recipe exactly as written, but fairly close.

I did use actual cheese instead of the vegan cheese, because real white queso is undeniably better than any alternative.

Crunchwrap supreme’s come together really quickly – within 30 minutes, so I highly recommend testing it out any night of the week.

Happy crunchwrap cooking!


Vegan Crunchwrap Supreme

INGREDIENTS

Spicy Sofritas Tofu

  • 3 tablespoons olive oil
  • 16 ounces extra firm tofu (press out some liquid first)
  • 2 tablespoons taco seasoning (add about 1 teaspoon salt if it’s unsalted)
  • 2 chipotle peppers, minced
  • 1/3 to 1/2 cup salsa

Cashew Queso

  • 1 cup cashews
  • 1/2 cup water
  • 1 can diced green chiles (or less, to taste)
  • 1 teaspoon taco seasoning (add a pinch of salt if it’s unsalted)

Crunchwraps

  • huge burrito-sized flour tortillas
  • something crunchy: tostadas, tortilla chips or, dare I say, Doritos / Hot Cheetos (!!)
  • roasted vegetables
  • black beans
  • avocados
  • fresh stuff: tomatoes, cabbage slaw, lettuce, cilantro
  • salsa

INSTRUCTIONS

  • Sofritas Tofu: Heat oil over medium high heat in a large nonstick skillet. Add tofu and break apart into crumbles. Add taco seasoning, salt, chipotles, and salsa. Get it all going in the pan, nice and hot. Finish by letting everything sit without stirring for another 10+ minutes (adding oil to prevent sticking as needed) until you get some nice browned, almost-crunchy pieces.
  • Cashew Queso: Blend everything together aggressively until smooth!
  • Crunch Wrap Time: Lay a large tortilla on a flat surface. Layer: tofu, queso, crunchy stuff, and any other extras you want in there. Fold in the edges of the tortilla toward the center. Place in a hot oiled skillet, seam side down. Cook for a few minutes on each side until the exterior is firm, crunchy, and golden brown. Cut and serve!
  • FOR REGULAR SIZE CRUNCHWRAPS: Keep your filling amounts minimal. It is very common to run into the issue of overflow, in which case, you can a) reduce filling amounts, b) fold it up as-is and hope for the best – I found even half-closed crunchwraps still grilled up nicely, c) break your tostadas into smaller pieces to allow you more space, or d) make a MEGA CRUNCHWRAP. See next note.
  • FOR MEGA CRUNCHWRAPS (this is what I demonstrated in the post): Cut a few of the large flour tortillas so they are the same size as your tostadas. Then, once you’ve layered all ingredients, just place a small flour cutout tortilla on top and fold edges over that. This should buy you a little extra space for filling.
  • FOR MARINATED CABBAGE: I just tossed some thinly chopped cabbage with olive oil, salt, pepper, and vinegar to taste.

Let me know how the recipe turned out for you in the comments below!

NYT’s Cheesy Baked Orzo With Marinara

“A vegetarian weeknight pasta that’s as comforting as it is easy, this dish will win over adults and kids alike (red-pepper flakes optional!).”

LIDEY HEUCK, NYT Cooking
Shelby’s Cheesy Baked Orzo With Marinara.

Hello! and yes, it is another NYT Cooking app recipe, and it is absolutely delicious! STEP ONE: Make sure your ingredients in the fridge are not expired before you’re in the middle of a recipe and without a viable ingredient! That was my one and only fail with this recipe. The mozzarella I had was expired so I used some cheddar gruyere in its place. It was still absolutely delicious.

HOT (but not-so-subtle) TIP, for those who are “almost” vegetarian, feel free to add meatballs to this dish, or even mockballs (veggie meatballs) if you have them.

This recipe was very straight forward. I followed this recipe as written, outside of the expired cheese, including salting the water thoroughly before baking the orzo. The orzo package I used made it clear how much salt to use based on the volume of orzo that was being boiled.

The orzo was a beautiful texture when cooked al dente! I recommend this dish for any night of the week. Especially if you have a standing pasta night.

Happy weeknight cooking!


Cheesy Baked Orzo With Marinara

INGREDIENTS

  • Kosher salt and black pepper
  • 1 cup orzo
  • 1 tablespoon olive oil
  • 2 teaspoons minced garlic (about 2 cloves)
  • ¼ teaspoon red-pepper flakes
  • 5 ounces fresh baby spinach (about 7 cups)
  • 1 (24- to 25-ounce) jar marinara sauce
  • ½ cup chopped fresh basil leaves, plus torn or sliced basil for serving
  • 1 cup shredded low-moisture mozzarella cheese (about 4 ounces)
  • ⅓ cup grated Parmesan cheese

INSTRUCTIONS

  • Heat the oven to 375 degrees and bring a large pot of salted water to boil. Add the orzo and cook according to package instructions until just al dente. Drain the orzo and set aside.
  • Meanwhile, in a very large (12-inch) ovenproof skillet, heat the olive oil over medium. Add the garlic and red-pepper flakes and cook until fragrant (don’t let the garlic burn), about 30 seconds to 1 minute. Add the spinach and a pinch of salt and cook, tossing often, until wilted, about 2 minutes. Add the marinara, basil, 1/2 teaspoon salt and 1/4 teaspoon black pepper. Bring to a simmer over medium heat, stirring occasionally, then remove from heat.
  • Stir the cooked orzo into the sauce. Stir in the mozzarella, sprinkle the Parmesan on top, and bake, uncovered, until the Parmesan is melted and the pasta is heated through, 15 to 20 minutes. Sprinkle with additional basil, and serve warm.

Let me know how the recipe turned out for you in the comments below!

NYT’s Sheet-Pan Harissa Salmon With Potatoes and Citrus

“This meal looks impressive right on the pan, so serve it from there and cut down on cleanup. You’ve got better things to do.”

COLU HENRY, NYT Cooking

I recently subscribed to the NYT Cooking site/app because I fell in love with Alison Roman’s “The Stew” recipe, and fell into a YouTube rabbit hole featuring all of NYT Cooking’s recipe videos. To get the exact recipes, you really need the subscription (so I bought it). So far, I can honestly say I’m glad I did subscribe because there is an even bigger library of how-to-videos, recipes, and you can even add your own cooking notes for them to review or just read other’s notes. Needless to say, it is a lot of fun, and where my dinner recipe is hailing from tonight.

This recipe was very straight forward. It has an “easy” icon on the top right corner of the thumbnail for this recipe within the NYT Cooking app. That should tell you all you need to know.

I followed this recipe as written, but I used half(ish) the amount of salmon so I cut my marinade in half. It can always be tricky to divide or double recipes, which makes me paranoid and take twice the amount of time to cook something because I’m constantly double-checking my steps.

The potatoes were almost perfect. I believe the potatoes and the onions needed a little more olive oil, or I burned the onions by laying them on the “shiny” side of the aluminum foil. They still tasted very good, just dry.

The salmon however, came out beautifully. I did cook it for about 3 minutes longer than the recipe calls for because I like a medium-well salmon whereas this recipe is cooking it medium rare. The citrus in the marinade really brightened the salmon, and the other ingredients gave the flavor a lot of depth.

I also made a batch of sriracha brussel sprouts over honey infused greek yogurt. The infusion was the honey I poured over the 0% Fage Greek Yogurt… Haha. They were delicious. My husband said, “You’ve really nailed your brussel sprouts.”

This sheet pan dinner was very simple, delicious, and quick. Next time I will use a little more garlic and a little less orange juice in the marinade, and more olive oil for the potatoes and onions. I can’t wait to make even more sheet pan dinners in the future!

Happy weeknight cooking!


Sheet-Pan Harissa Salmon With Potatoes and Citrus

INGREDIENTS

  • 4 (6-ounce) skin-on salmon fillets, about 1- to 1½-inches thick
  •  Kosher salt and black pepper
  • 2 to 3 tablespoons mild or spicy harissa paste, depending on your preference
  • 2 teaspoons grated fresh ginger
  • 1 garlic clove, grated
  • ½ teaspoon orange zest
  • ¼ cup orange juice (from about ½ orange)
  • 1 pound small potatoes, such as baby red or fingerlings, cut in half lengthwise
  • 1 small red onion, peeled, quartered and cut into ½-inch wedges
  • 2 tablespoons olive oil
  • ¼ cup cilantro, roughly chopped, both leaves and tender stems
  • 3 tablespoons scallions, thinly sliced on an angle, both white and green parts
  •  Flaky salt, for serving

INSTRUCTIONS

  • Heat oven to 450 degrees. Lay salmon on a plate, and season with salt and pepper. In a shallow bowl, whisk together harissa, ginger, garlic, orange zest and juice. Spoon the mixture over the flesh and sides of the fish, and let marinate at room temperature.
  • Meanwhile, line a sheet pan with parchment paper (or use a nonstick sheet pan). In a large bowl, toss together the potatoes and onion with the olive oil, and season well with salt and pepper. Arrange them on the sheet pan in 1 layer, leaving 4 spaces for the salmon fillets to be added later. Roast until the potatoes are beginning to brown and are almost cooked through, about 20 minutes.
  • Add the salmon to the sheet pan skin-side down, and roast until the fish is opaque and cooked through and the potatoes are crisp, about 8 minutes more. Scatter cilantro and scallions over everything, and season with flaky salt.

Let me know how the recipe turned out for you in the comments below!

Nyssa’s Kitchen Chickpea and Tomato Coconut Curry Soup

“You know the feeling – don’t you? When you suddenly find yourself reaching for your fleece before getting in your car to drive home from work, bc BRRR as you think about what would be good for dinner, and the only answer that chimes in your head with a resounding YES is… soup.”

Nyssa’s Kitchen
Shelby’s Chickpea and Tomato Coconut Curry Soup

I came across this 30-minutes Chickpea and Tomato Coconut Curry Soup, by Nyssa’s Kitchen, on Pinterest and couldn’t wait to test it out. Based on the title of this recipe, I knew it would make for a great week-night dinner, meatless Monday, and meal prep. So for my first trial of this recipe, I made it on a Monday night at the same time I made vegan burrito bowls. I was able to eat off of both for the rest of the week for lunch and dinner. Great strategy! Read more of my experience below.

I tested the recipe twice. I followed this recipe as written, but the first time the only ingredient I didn’t have was fire roasted diced tomatoes. I used regular diced tomatoes. The regular diced tomatoes were too acidic, but the fire roasted added a really yummy smokiness to balance the creaminess of coconut milk.

On the second test of this recipe, I realized I needed to cook the chickpeas a little longer before adding the coconut milk and broth. The chickpeas were a little too firm for a soup. Also, the first time I made this recipe I used Aroy-D coconut milk, which is the recommended brand by America’s Test Kitchen. The second time I used the Trader Joe’s organic coconut milk, and I definitely prefer this soup with the Aroy-D coconut milk.

For the garnish, I didn’t add the red onion, but I did add the cilantro, cashews and lime. I highly recommend all three garnishes. The lime and cilantro brighten or freshen (pick your adjective) the soup a lot, and the cashews add a wonderful nutty flavor.

I really liked this soup and recommend making it. Note: expect for your home to smell like curry for two-three days. It’s a wonderful smell to come home to in my opinion. It smells warm, and inviting.

Happy souping!


30 Minute Chickpea and Tomato Coconut Curry Soup

INGREDIENTS

  • 2 tablespoons avocado oil
  • 1 medium sized onion, diced small 
  • 4 cloves of garlic, thinly sliced 
  • 1 teaspoon salt
  • 1 tablespoon curry powder 
  • pinch of crushed dried chilies (optional – leave out for less spicy)
  • 1 14.5 oz can of petite diced tomatoes – fire roasted are yummy if you can find them
  • 2 15.5 oz cans of chickpeas, drained and rinsed
  • 1 can full fat coconut milk 
  • 3 cups of broth of choice 
  • juice of half a lime

for garnish

  • fresh lime 
  • thinly sliced red onion 
  • cilantro 
  • roasted cashews – bonus points for curry spiced cashews!

INSTRUCTIONS

  • Heat the oil over medium heat in a large soup pot. Add the onion, garlic and teaspoon of salt. Saute for about 5-6 minutes, stirring occasionally, until translucent and soft. 
  • Next add the curry powder and pinch of dried chili and stir almost constantly for about 30 seconds or so, until spices are fragrant and start to stick to the bottom of the pan. 
  • Add the diced tomatoes and broth.
  • Scrape up any brown bits from the bottom of the pan. Bring to a boil and then reduce to a simmer.
  • Cover and cook for about 10 minutes, until tomatoes are soft. 
  • Add chickpeas and coconut milk and bring back up to a simmer. Simmer for another 5 minutes or so to marry the flavors. 
  • Season with salt and pepper and juice of half a lime. 
  • Serve topped with sliced red onion, cilantro, roasted cashews and more lime wedges. 

Let me know how the recipe turned out for you in the comments below!

The Curious Chickpea’s Vegan Tahini Chocolate Chip Cookies

“Here we have it folks. The cookies of your dreams. The cookies that have been missing from your lives. Cookies that will make you go a little crazy. Cookies with a secret ingredient that you already know about because it’s in the title of this post 😛 .”

Eva, the Curious Chickpea
Shelby’s attempt at Chewy Vegan Tahini Chocolate Chip Cookies.

My favorite desert on this planet is the glorious chocolate chip cookie. In 2017, I attempted to recreate this Chocolate Chip Cookie recipe trial that Buzzfeed did, but I didn’t get through all of the recipes. Once I made the Nestle Tollhouse recipe, I didn’t feel the need to look further (post about the tollhouse cookies coming soon).

A few of my other favorite things includes warm sunny days, the smell of fall, and THIS planet. I mean to say that I am attempting to eat more vegan/vegetarian in order to do my small part in curbing climate change.

I also love tahini and salt, so when I came across this recipe I couldn’t wait to test it out.

Let’s discuss, shall we?

I followed this recipe as written. The cookies turned out pretty good. My husband and sister loved these cookies. I thought the cookies were very yummy, but they crumbled whenever holding in between your fingers.

At the start time of making the cookies, my coconut oil was in the fridge (a solid block) and the recipe calls for room temps, scoop-able coconut oil. I put my coconut oil in the microwave in hope to get it to room temperature, and it worked. However, since this was the only mistake I can knowingly made, it may be the reason the cookies were crumbly and thicker than Chickpea’s cookies.

The next time I attempt to make these cookies I am going to weigh the ingredients instead of using the cups/spoons metrics. Not weighing the ingredients could also lead to the cookies being thick or crumbly.

I have read that over mixing cookie dough can lead to thick cookies, but because I know this, I was very careful not to over-mix the dough, especially once the flour was incorporated.

The cookies really were delicious, and didn’t look that far off from Chickpea’s. I look forward to making these again, and maybe for a crowd next time!

I recommend testing out the recipe yourself. Happy baking!


CHEWY VEGAN TAHINI CHOCOLATE CHIP COOKIES RECIPE

INGREDIENTS

  • 1/2 cup (113g) refined coconut oil at room temperature, creamy and soft and scoopable texture
  • 1/2 cup (122g) tahini (see note)
  • 1/2 cup (100g) granulated sugar
  • 1/3 cup (60g) packed brown sugar
  • 1/4 cup (55g) plant milk
  • 1 tsp (4g) vanilla extract
  • 1 1/4 cup (165g) all purpose flour
  • 2 tbsp (18g) cornstarch
  • 1 tsp (5g) salt
  • 1/2 tsp (2g) baking powder
  • 1/2 tsp (2g) baking soda
  • 1 3/4 cups (200g) chopped dark chocolate, 60-70% dark
  • flaked sea salt, such as Maldon

INSTRUCTIONS

  1. Using an electric mixer, beat the coconut oil, tahini, granulated sugar, and brown sugar on medium for about 3 minutes until a smooth and creamy mixture is formed. Add the plant milk and the vanilla extract and mix another minute to combine. This can also be done with a wooden spoon, but will take more effort to cream.
  2. In a separate mixing bowl whisk together the flour, cornstarch, salt, baking powder, and baking soda to combine. Add the dry ingredients to the creamed oil and sugar mixture and mix on low speed until just incorporated. Fold in the chopped chocolate.
  3. Put the cookie dough in the fridge for at least 30 minutes while you preheat the oven, or leave in the fridge to bake the next day. Transfer to the freezer for longer storage of the cookie dough (pre-scoop the dough into balls and bake straight from frozen, and may need to add a couple of minutes onto the baking time).
  4. Preheat the oven to 350 ºF with one rack in the center of the oven. Line two baking trays with parchment paper or a silicon mat.
  5. Scoop the cookie dough into 2 tbsp (1oz) portions, a cookie scoop makes quick work of this. Place the cookie dough balls on the baking trays 3″ apart.
  6. Bake the cookies, one sheet at a time, for 12-13 minutes, or until the edges are just barely golden and the center is a shade lighter.
  7. Remove from oven and immediately sprinkle some flaked salt on top of the cookies. Let cool on the baking tray. Bake the remaining cookies the same way.

NOTES

*prep time includes 30 minutes to chill the cookie dough.


Let me know how the recipe turned out for you in the comments below!

Molly Yeh’s Fortune Cookies

“They’re really not difficult, and they’re a million times better than the restaurant ones.”

Molly Yeh
Shelby’s Fortune Cookie Attempt

If you don’t know by now, I am a big fan of Girl Meets Farm/Molly yeh. I was watching one of the episodes from season two that is dedicated to Chinese New Year, and Molly makes fortune cookies with her sisters. I watched twice scene TWICE before making the cookies. It really looks very simple. Alas, only 4 out of 12 cookies turned out to make the shape (and still two of those suffered serious cracks).

Let’s discuss, shall we?

I want to reiterate that I watched Molly make these twice before following the recipe exactly as written. I had three people attempting to help me shape into the muffin tins as soon as these came out of the oven, I knew when it took almost double the time to bake the cookies, that they were going to be too thick. I believe this was 100% my problem with this recipe.

Now, the batter looked exactly as it did in her episode. It was fairly runny for a cookie dough/batter. I have a set of different size circle cookie cutters (or biscuit, what every you need to cut into a circle), and there is a 2.9″ and 3.2″ circle. Molly said to use the 3″ mason jar lid as a guide, so I went with the 2.9.” I believe if I went with the 3.2″ the cookies may have not been as thick. Very hard to know if this could have been the problem.

Why was the thickness a problem? The cookies were impossible to shape correctly because of the thickness in the center.

One other problem that could have occurred, is that I put the batter on a silpat mat on a cookie sheet. Molly greased a half or quarter sheet (no parchment nor foil) and placed the batter directly on the pan. Not sure if the silpat caused the cookies to need to bake longer, and remain thick instead of spreading.

The actual batter came together very easily. Once these cookies come out of the oven they are HOT, so attempting to shape them as quickly as possible can be a little painful on the finger tips. They cook in no time, and the ingredients are easy to find.

For two of the fortune cookies I created a matcha swirl in the batter. This did not change the consistency of the batter nor texture from the other fortune cookies. So feel free to add a matcha swirl! I was impressed by heart imprints on these fortune cookies.

I definitely encourage anyone attempting to make their own fortune cookies. They taste 100% better than the styrofoam-like fortune cookies you can find in most restaurants.

Happy baking!


Fortune Cookie Recipe

INGREDIENTS

  • 1/2 c sugar
  • 1/2 c all-purpose flour*
  • 1/2 tsp kosher salt
  • 1 pinch of cardamom
  • 2 egg whites
  • 1/2 tsp vanilla extract
  • 1/4 tsp almond extract
  • 12 strips of paper with fortunes
  • *for a gluten free option, you can use almond flour instead. You may need to bake them for a minute or two longer.

INSTRUCTIONS

Preheat oven to 375.

In a medium bowl, whisk together the dry ingredients. In a separate medium bowl, whisk together the egg whites and extracts. Sift in the dry ingredients and whisk it… whisk it good, until you have a smooth batter.

Grease a cookie sheet and then spread a tablespoon of batter into a 3-inch circle (it helps to use the lid of a ball jar as a guide). Only bake three circles at a time so that you have time to mold the cookies before they cool.

Bake for 5-7 minutes, until the edges are brown. Working quickly (but carefully, as to not burn your fingers), use a spatula to flip a circle over. Place a fortune in the center, fold the circle in half, and then pick it up and bend the folded side over the edge of a bowl to form your fortune cookie shape.

Place in a muffin tin so that the shape holds while it cools.

Repeat with remaining circles, and then bake another batch.


Let me know how the recipe turned out for you in the comments below!

Bon Appetit’s Breakfast Bowl with Sweet Potatoes and Turmeric Egg

“Adding turmeric to the poaching liquid in this breakfast bowl recipe imparts a deep golden hue to the egg.”

Bon Appetit

Bon Appetit is one of my favorite places to go for recipe inspiration. However, this recipe was a mild disappointment, and with as many recipes as they have on their site, not all of them can be winners. ALSO, I did some of improvisation, so the results could be my fault.

Let’s discuss, shall we?

I followed this recipe as written in regards to roasting the sweet potatoes and onions. I mixed all of seasonings with the olive oil, tossed with the potatoes and onion, and roasted as written. I did not follow the written directions for the bacon. I used morning star vegetarian patties instead.

I used purple leafy greens, and used a full cup of parsley. I believe the parsley needed to be more finely chopped, and cut in half to only half a cup. The large amount of parsley brightened up the salad too much.

There was also too much lemon. I would also cut this down all the way to just a squeeze of lemon on the lettuce.

Next was the major failure that was attempting to poach eggs. I should have used a saucepan as the recipe is written. I used a deep skillet. I also accidentally added a pinch of salt to the water. This disturbs the chemistry of the egg, simmering water, and vinegar. I watched a video, in the middle of poaching the four eggs, that mentioned the best way to get a perfectly poached egg is to use the freshest eggs possible. As in going to the store that morning to buy them. I used eggs that have been in my fridge for close a week or longer. It also mentioned stirring the water to create a vortex and dropping the egg into the vortex.

I did not do any of this and my eggs didn’t look anything close to perfectly poached eggs. And the turmeric stained my skillet and slotted spoon forever yellow.

I did add tomatoes, which also brightened up the salad too much. I added a dollop of homemade hummus instead of avocado, which I am so glad I did. It helped to bring earthiness back to the salad.

Feel free to try to make this on your own as Bon Appetit intended for it to be made, but I would still cut the parsley and lemon way down.


Breakfast Bowl with Sweet Potatoes and Turmeric Egg

INGREDIENTS

  • ¾ teaspoon garlic powder
  • ¼ teaspoon cayenne pepper
  • ¾ teaspoon smoked paprika, plus more for serving
  • 3 tablespoons olive oil, plus more for drizzling
  • 1 medium sweet potato, cut into ¾-inch pieces
  • 1 medium garnet yam, cut into ¾-inch pieces
  • 1 small red onion, chopped
  • Kosher salt, freshly ground pepper
  • 12 slices bacon (about 12 ounces)
  • 1 teaspoon finely chopped oregano
  • ¼ cup distilled white vinegar
  • 2 teaspoons ground turmeric
  • 4 large eggs
  • 8 ounces baby greens (about 10 cups)
  • 1 cup dill sprigs
  • 1 cup parsley leaves with tender stems
  • 3 tablespoons fresh lemon juice
  • 1 avocado, quartered lengthwise, thinly sliced
  • Smoked sea salt (for serving; optional)

INSTRUCTIONS

  • Place a rack in the center of oven and preheat to 425°. Whisk garlic powder, cayenne, ¾ tsp. paprika, and 3 Tbsp. oil in a large bowl. Add sweet potato, yam, and onion and toss to coat; season with kosher salt and pepper. Spread out sweet potato mixture on a parchment-lined rimmed baking sheet. Place bacon on a separate parchment-lined baking sheet. Roast, tossing sweet potato mixture halfway through, until bacon is brown and crisp and sweet potato and yam are golden brown in spots, 12–14 minutes for bacon and 25–30 minutes for sweet potato mixture. Remove bacon from oven and cut into 1″ pieces. Remove sweet potato hash from oven and toss with oregano.
  • Pour 2″ water into a large saucepan and bring to a boil; reduce heat so water is at a gentle simmer and add vinegar and turmeric. Crack an egg into a small bowl, then gently slide egg into water. Repeat with remaining eggs, waiting until whites of eggs in water are opaque before adding the next egg (about 30 seconds apart). Poach until whites are set but yolks are still runny, about 3 minutes. Using a slotted spoon, transfer eggs to paper towels as they are done and let drain.
  • Toss greens, dill, parsley, lemon juice, and bacon in a large bowl. Drizzle with oil, season with kosher salt and pepper, and toss again.
  • Divide salad among bowls and top each with sweet potato hash, avocado, and a turmeric-poached egg. Sprinkle with smoked sea salt, if using, and more paprika.

Let me know how the recipe turned out for you in the comments below!

Molly Yeh’s Carrot Apple Juice

“Healthy juice for adults.”

Molly Yeh
Carrot Apple Juice

I’m so happy I came across this recipe. I was watching Girl Meets Farm, when I saw Molly making this juice. Luckily for me, I’ve recently fallen in love with turmeric and ginger, so I was immediately intrigued. I also have a juicer, so I knew this would be a cinch-it was! I highly recommend testing this out for yourself. It was sweet, savory, spicy, and just absolutely delicious.

NOTE:

There is no getting around this recipe, you will need a juicer.


Carrot Apple Juice

INGREDIENTS

  • 3 medium Honeycrisp apples (about 19 ounces or 546 grams)
  • 3 medium carrots (about 6.5 ounces or 180 grams)
  • 2-inch piece ginger (about 1/2 ounce or 14 grams)
  • 1-inch piece fresh turmeric root (about 1/4 ounce or 7.8 grams)
  • 1 medium lemon (about 3 ounces)
  • Pinch cayenne pepper

INSTRUCTIONS

Juice in this order: the apples, carrots, ginger and turmeric, following the manufacturer’s specific directions for each. Add the lemon juice and cayenne pepper and stir to combine. Serve immediately over ice or keep covered and refrigerated for up to 3 days.


Let me know how the recipe turned out for you in the comments below!

Design a site like this with WordPress.com
Get started