Budget Bytes Banana Flax Muffins

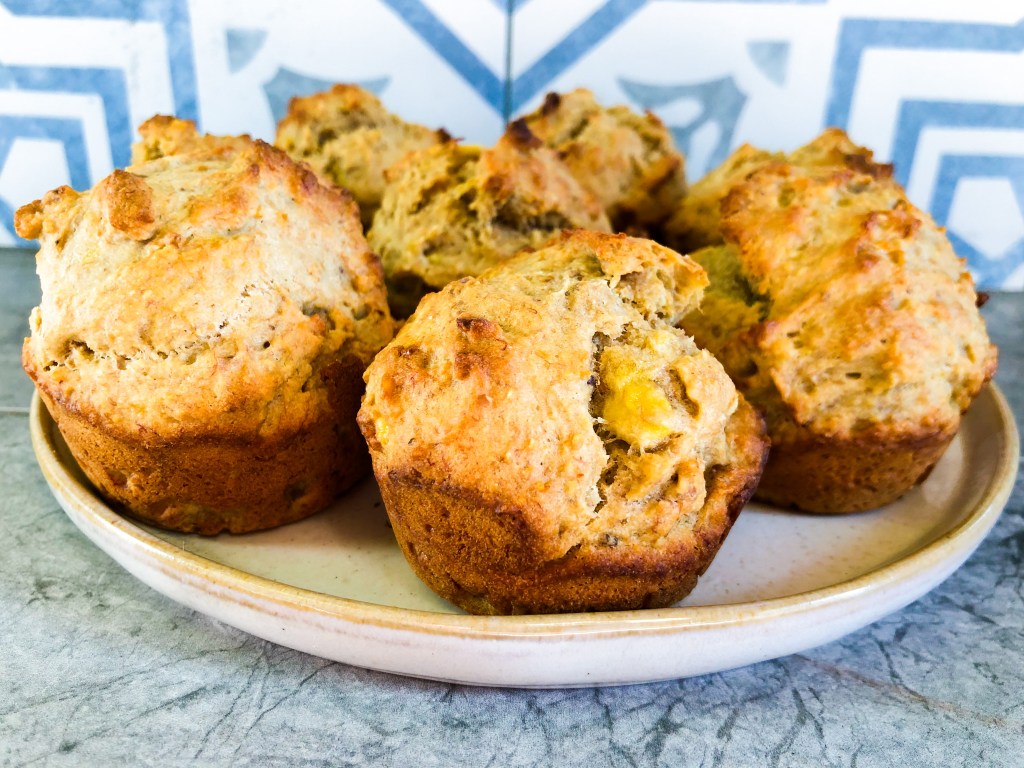
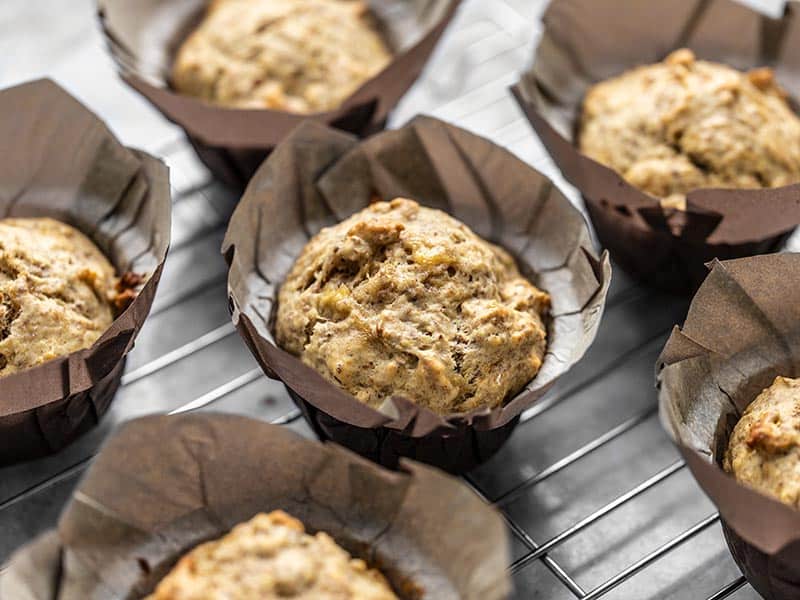
“I’m going to start this by saying that I am not an expert baker… but I started playing around in my kitchen the other night with a bunch of brown bananas that I had, and I made these banana flax muffins that I ended up liking so much that I just had to share.”

Beth, Budget Bytes
Shelby’s Banana Flax Muffin trial!

Budget Bytes is one of my favorite sites to find new recipes. I love that the recipes are budget friendly/conscious, as a lot of recipes can be pricey, and there is a plethora of vegetarian recipes (probably due to the fact that meat can greatly increase the price of a recipe).

When I came across this recipe, I immediately thought of it for a mid-week meal prep for breakfast. I doubled the recipe, because 6 muffins is not worth getting a 12-cup muffin dirty.

Doubling the recipe was easy. I recommend having your ingredients sorted and ready before starting a recipe ESPECIALLY when doubling a recipe. You are more likely to remember to double the ingredients when you’re doing it on purpose versus when you’re rushing to add ingredients to a mixer.

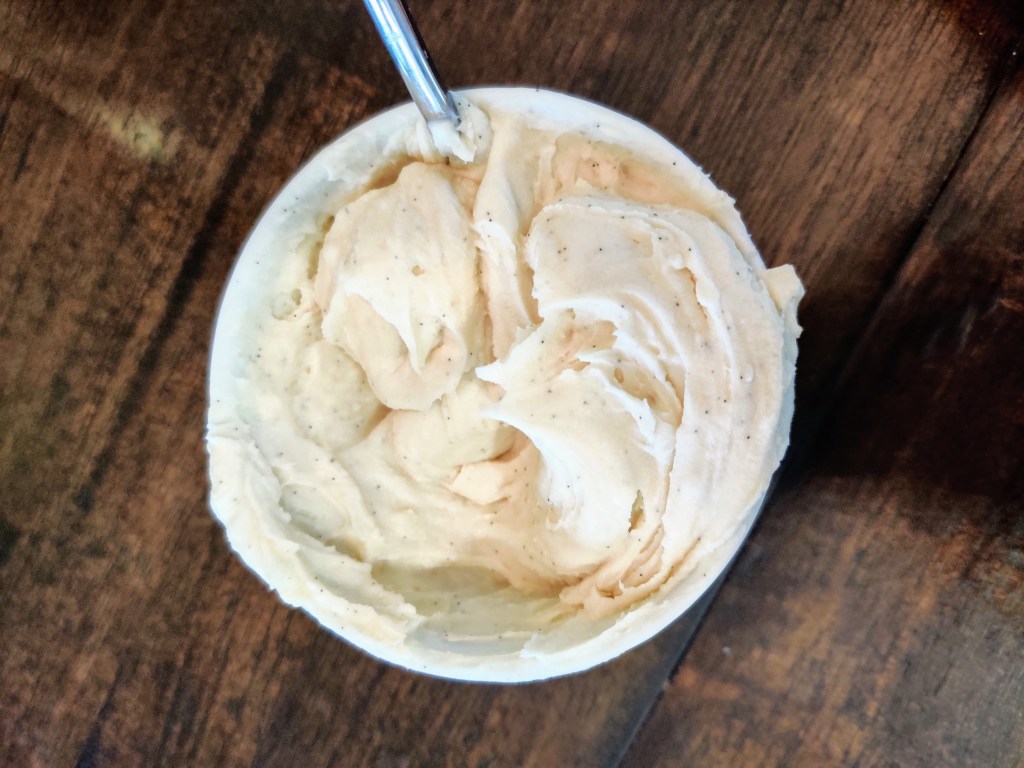
To start out, I used bananas that were ripe, but MAYBE could have gone one more day. I ended up using pieces of 5 bananas because parts of other bananas were brown already. Had I let them last one more day, they may have been sweeter or have even more banana flavor. They turned out great, but this could have been a possibility.

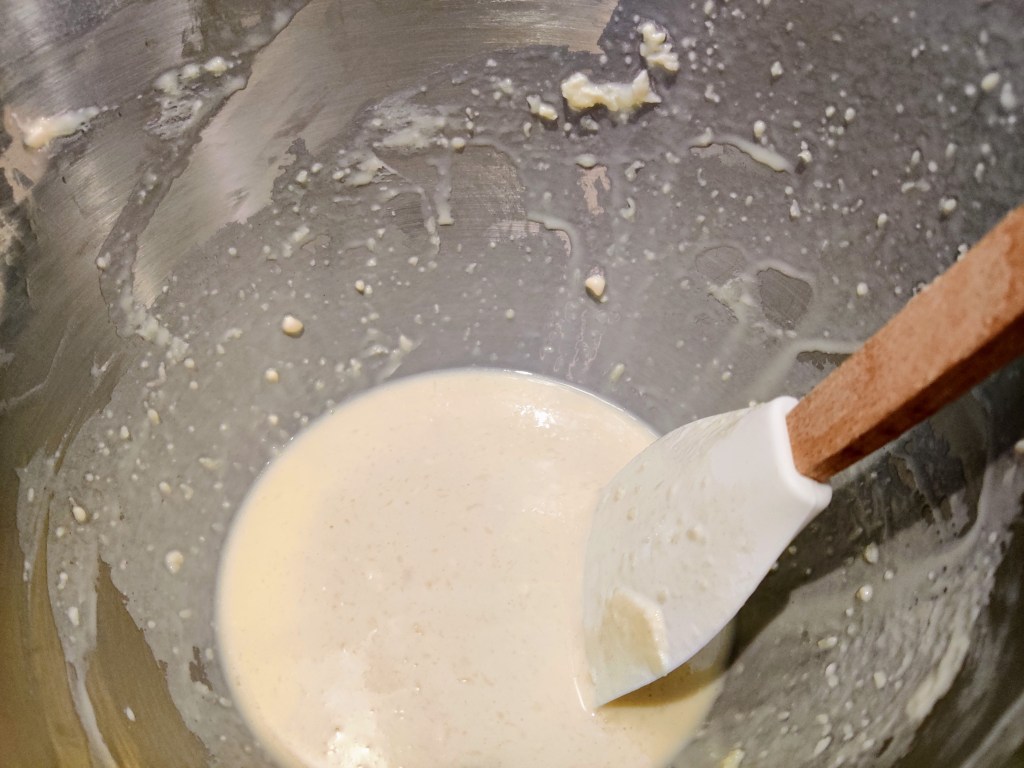
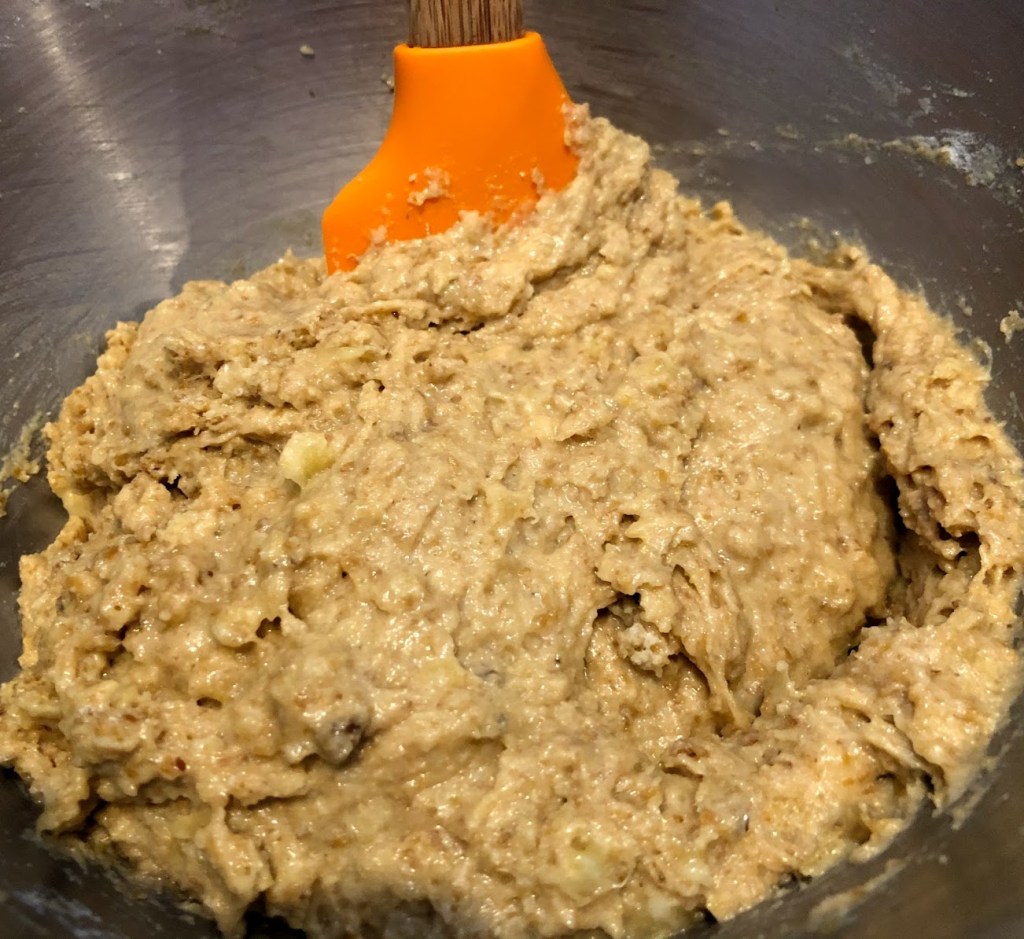
I made this recipe in a kitchen aid mixer. You can see in the original recipe that Beth did not. Since I made in a kitchen aid mixer, I mixed the ingredients on low just until combined to keep from over-mixing the batter.

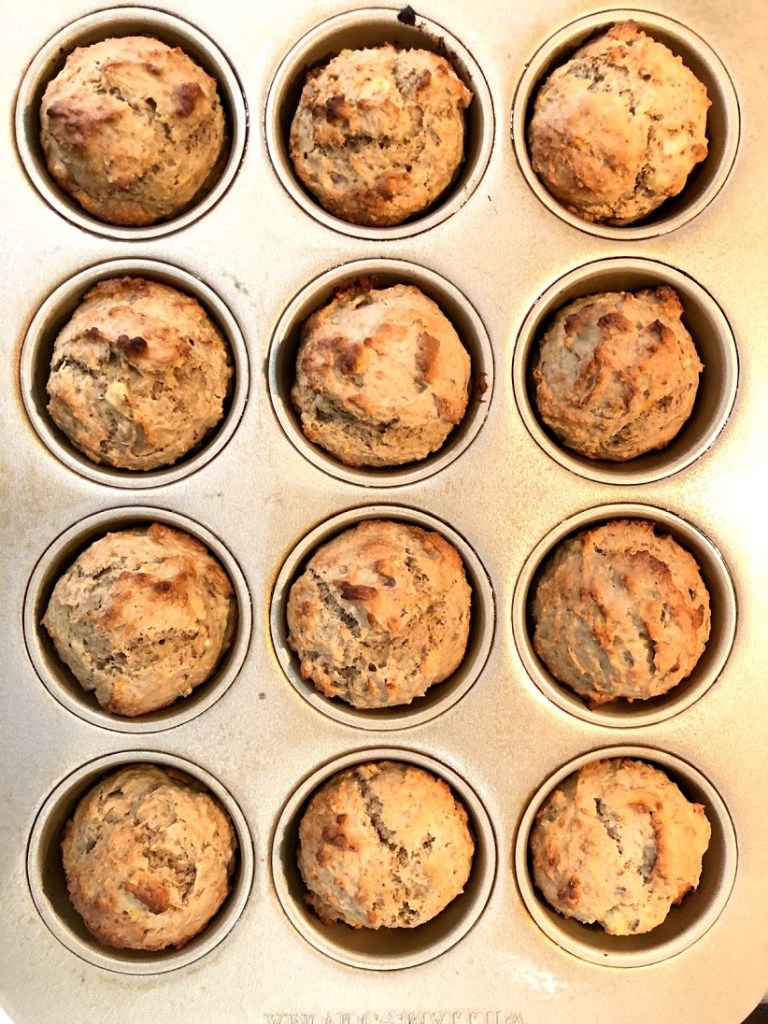
To portion out the batter I used a cookie scooper (2 scoops) to easily fill the tin up to the rim. Make sure to read the directions carefully for the temperature change, and let them bake!


Banana Flax Muffin Recipe

INGREDIENTS

  • 3/4 cup mashed ripe bananas*
  • 1 large egg
  • 2 Tbsp brown sugar
  • 1/2 tsp vanilla
  • 2 Tbsp olive oil
  • 1 cup all-purpose flour 
  • 1 tsp baking powder 
  • 1/4 tsp salt
  • 1/4 cup ground flaxseed
  • 1/4 cup chopped walnuts (optional)

INSTRUCTIONS

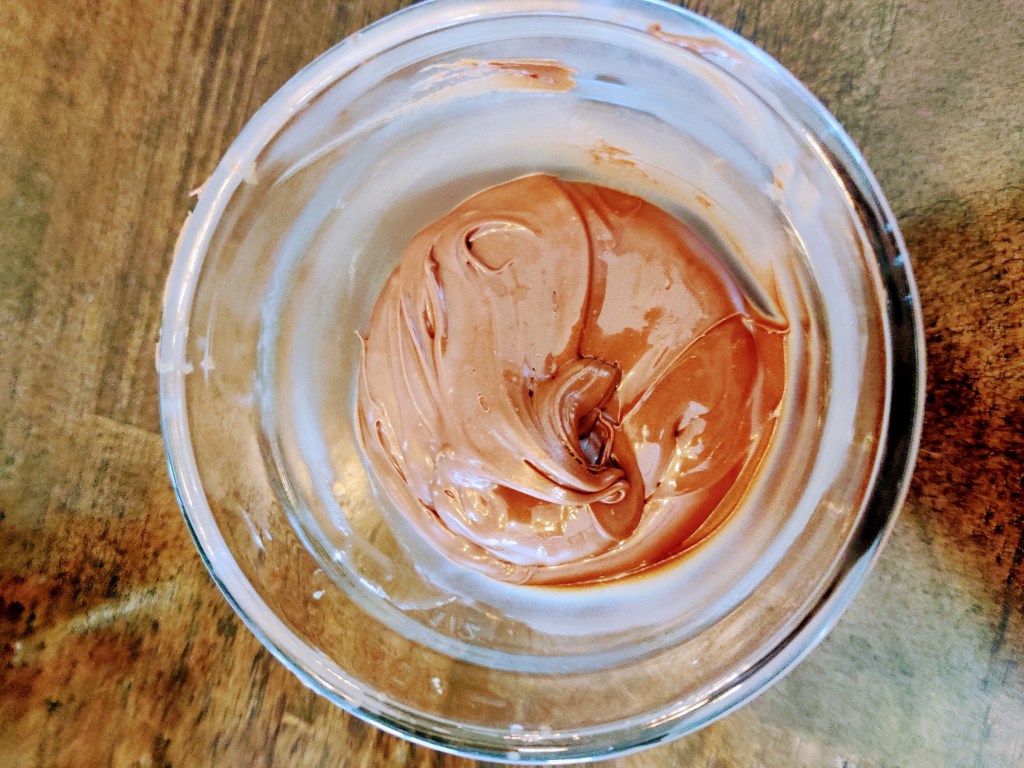
  • Preheat the oven to 425ºF. In a medium bowl whisk together the mashed banana, egg, brown sugar, vanilla, and olive oil.
  • In a separate medium bowl, stir together the flour, baking powder, salt, flaxseed, and walnuts.
  • Pour the wet ingredients into the bowl of dry ingredients and stir them together just until no dry flour remains on the bottom of the bowl. Avoid over stirring the batter.
  • Line six wells of a muffin tin with paper liners, then divide the batter evenly between the six wells. It should fill the wells almost to the top.
  • Transfer the muffins to the oven and bake at 425ºF for five minutes, then reduce the heat setting to 350ºF without opening the oven door, and bake for an additional 20 minutes.
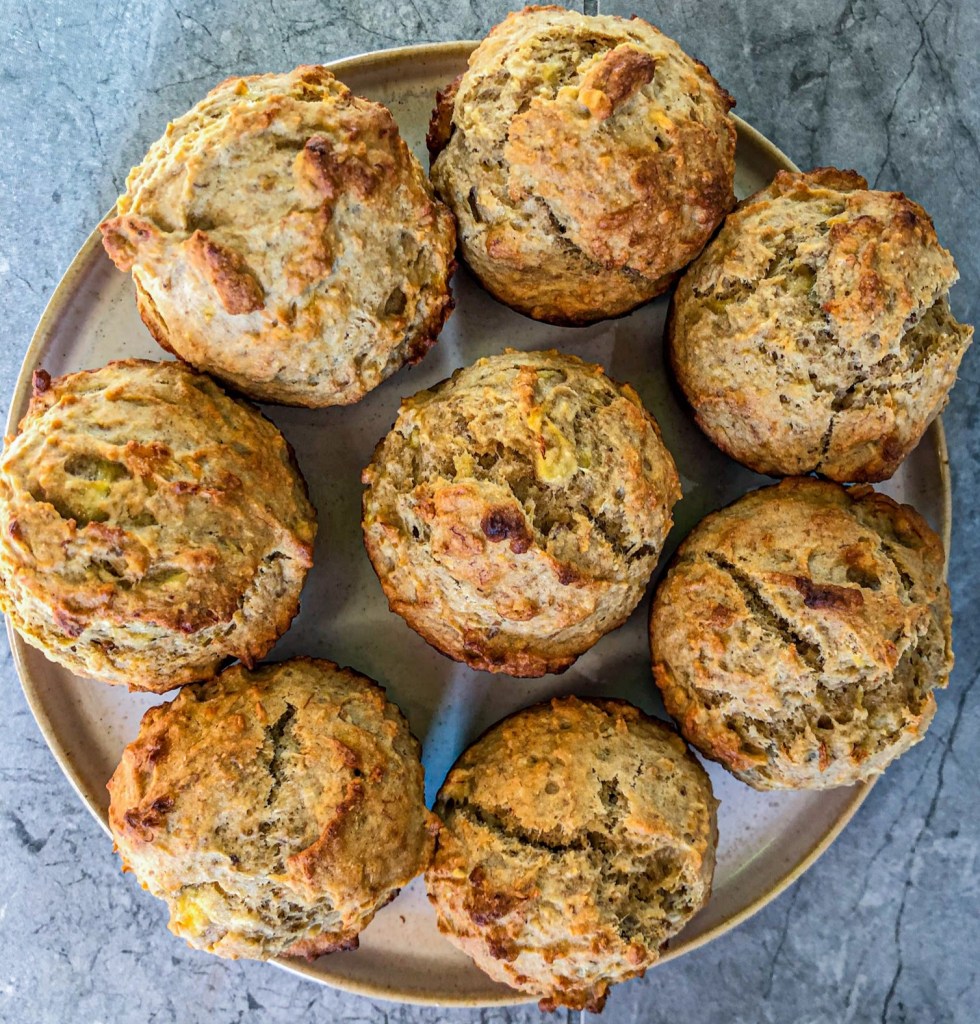
  • After baking, remove the muffins from the tin to allow them to cool. Enjoy the muffins immediately, or allow them to cool completely and then store in an air-tight container in the refrigerator.

NOTES

* Make sure the bananas are very ripe, about half brown, to make sure the muffins have enough moisture and sweetness. It should take roughly 2 large bananas to make 3/4 cup mashed.


Let me know how the recipe turned out for you in the comments below!

“The Stew” by Alison Roman

“Spiced chickpeas are crisped in olive oil, then simmered in a garlicky coconut milk for an insanely creamy, basically-good-for-you stew that evokes South Indian chana and some stews found in parts of the Caribbean.”

Alison Roman
Chickpeas getting crispy!

I came across this phenomenal stew on YouTube as it was recommended to me a few weeks ago. I didn’t realize this was a “viral” stew on the food scene until watching the video. I was immediately intrigued, and I’ve since made this stew TWICE in two weeks. I absolutely LOVE it. The stew is the full of so many flavors that come together beautifully. It is rich, spicy, creamy, thick, mushy, crunchy, and full of so much life. I made the stew vegetarian, but it could easily be vegan, just omit the greek yogurt.

I promise, you’re going to want to make this stew.

I recommend watching the video of Alison Roman making the stew before making it yourself. She speaks to her technique when approaching this recipe. It also helps cut out the intimidation.

Getting the chickpeas crispy is key at the beginning of this recipe. This is where the crunch comes in at the end (outside of leafy greens). So, when adding olive oil, I didn’t measure out an actual 1/4 cup, I tossed enough in my dutch oven to coat the bottom. Once the onion, garlic, and ginger were cooking, I added in the chickpeas, and then I added more olive oil based on how well coated the chickpeas were. This worked great for me, and the chickpeas crisped up.

Before I added in the wet ingredients, I started to mush up the remaining chickpeas in the dutch oven. I didn’t spend a lot of time doing this, only because I wanted to get the stew cooking. Next, I added the coconut milk, and the vegetable stock. I then mushed up the chickpeas more as the stew started to simmer and then left it alone for 10 minutes at a time. I came around to stir it and mush more chickpeas on three time.

“The Stew” once the kale was added.

The stew thickened up perfectly. It was definitely a stew as opposed to a soup. Once I put the kale in, it soaked up a lot of the stew base, making it even thicker.

I served the dish to myself and my husband as Alison Roman recommends: adding a dollop of greek yogurt (sour cream might be a good substitute if you don’t have yogurt), fresh cilantro, fresh mint, a dust of turmeric, and sprinkle of red pepper flakes. I highly recommend adding the toppings, especially the greek yogurt, but the stew is perfect without those toppings.

I now love cooking with ginger and coconut milk. This stew has definitely encouraged me to test more vegan recipes.

Happy stewing!


Spiced Chickpea Stew With Coconut and Turmeric Recipe

Ingredients

  • ¼ cup olive oil, plus more for serving
  • 4 garlic cloves, chopped
  • 1 large yellow onion, chopped
  • 1 (2-inch) piece ginger, finely chopped
  •  Kosher salt and black pepper
  • 1 ½ teaspoons ground turmeric, plus more for serving
  • 1 teaspoon red-pepper flakes, plus more for serving
  • 2 (15-ounce) cans chickpeas, drained and rinsed
  • 2 (15-ounce) cans full-fat coconut milk
  • 2 cups vegetable or chicken stock
  • 1 bunch Swiss chard, kale or collard greens, stems removed, torn into bite-size pieces
  • 1 cup mint leaves, for serving
  •  Yogurt, for serving (optional)
  •  Toasted pita, lavash or other flatbread, for serving (optional)

PREPARATION

  1. Heat oil in a large pot over medium heat. Add garlic, onion and ginger. Season with salt and pepper and cook, stirring occasionally until onion is translucent and starts to brown a little around the edges, 3 to 5 minutes.
  2. Add turmeric, red-pepper flakes and chickpeas, and season with salt and pepper. Cook, stirring frequently, so the chickpeas sizzle and fry a bit in the spices and oil, until they’ve started to break down and get a little browned and crisp, 8 to 10 minutes. Remove about a cup of chickpeas and set aside for garnish.
  3. Using a wooden spoon or spatula, further crush the remaining chickpeas slightly to release their starchy insides (this will help thicken the stew). Add coconut milk and stock to the pot, and season with salt and pepper. Bring to a simmer, scraping up any bits that have formed on the bottom of the pot. Cook, stirring occasionally, until stew has thickened and flavors have started to come together, 30 to 35 minutes. (Taste a chickpea or two, not just the liquid, to make sure they have simmered long enough to taste as delicious as possible.) If after 30 to 35 minutes you want the stew a bit thicker, keep simmering until you’ve reached your desired consistency. Determining perfect stew thickness is a personal journey! 
  4. Add greens and stir, making sure they’re submerged in the liquid. Cook a few minutes so they wilt and soften, 3 to 7 minutes, depending on what you’re using. (Swiss chard and spinach will wilt and soften much faster than kale or collard greens.) Season again with salt and pepper.
  5. Divide among bowls and top with mint, reserved chickpeas, a sprinkle of red-pepper flakes and a good drizzle of olive oil. Serve alongside yogurt and toasted pita if using; dust the yogurt with turmeric if you’d like.

Let me know how the recipe turned out for you in the comments below!

Molly Yehs Bagel Salad

“This is going to be a really crunchy salad”

Molly Yeh
Everything Bagel Salad!

One of my favorite Sunday morning activities is watching Girl Meets Farm, Molly Yeh’s tv show on the Food Network. I was watching one of her brunch episodes and came across one of the most genius recipes I believe anyone can develop… an everything bagel salad! Two of my favorite foods combined! What a dream.

So, while Molly made this for her girlfriends for a fun brunch, I couldn’t wait and made it for dinner on the same day I watched that episode. My only twist was adding salmon (in place of lox). Read on for the recipe trial experience.

I got started by cutting up two bagels. I bought the bagels from the farmers market, that were made the day before, and left them out of the fridge all day to help them become more stale. I succeeded! The bagels had the perfect crouton crunchy texture after cooking them in the skillet.

The cream cheese balls were a bit messy, but completely worth it.

For the dressing, I had all of the ingredients but the Dijon mustard. I substituted the Dijon mustard with spicy brown mustard. The dressing was still zingy, and tangy, with a hint of spice. I believe it was a completely okay substitute, but maybe stick to the recipe.

This salad was everything (pun intended) I could have hoped for from this recipe. I will be making this often, especially any time I can get some gal pals together for a brunch. Happy everything bagel salad making!


Everything Bagel Salad Recipe

Ingredients

Dressing:

  • 1 tablespoon lemon juice
  • 1 tablespoon Dijon mustard
  • 1 teaspoon honey
  • 1/2 cup extra-virgin olive oil
  • 2 scallions, finely chopped
  • Kosher salt and freshly ground black pepper

Salad:

  • 2 tablespoons unsalted butter
  • 2 large everything bagels, torn into bite-sized pieces
  • Kosher salt and freshly ground black pepper
  • 4 large eggs
  • 2 tablespoons everything bagel topping (see Cook’s Note)
  • 4 ounces cream cheese (1/2 block), cut into 1/2- to 3/4-inch cubes
  • 5 ounces mixed baby greens
  • 4 medium tomatoes, cut into wedges
  • 1/2 English cucumber, thinly sliced
  • 1/2 small red onion, thinly sliced
  • 2 scallions, chopped
  • 4 sprigs fresh dill, leaves only

For the dressing: Whisk together the lemon juice, Dijon and honey in a small bowl. Drizzle in the olive oil while whisking until creamy. Stir in the scallions and season with salt and pepper.

For the salad: Heat the butter in a skillet over medium heat. Add the bagels and cook, tossing occasionally, until golden and crispy on the outside, about 7 minutes (they’ll still be a little chewy on the inside, but that’s good). Transfer to a plate, sprinkle with salt and set aside.

Bring a pot of water to a boil and prepare an ice water bath. Carefully lower the eggs into the boiling water, reduce to a simmer and cook for 8 minutes. Transfer to the ice bath to cool (or run under cold water for a little). Peel and slice into halves or quarters.

Place the everything bagel topping in a bowl. Roll the cream cheese cubes into little balls with your hands and then roll them around in the everything bagel topping.

On a serving plate, arrange the mixed greens. Top with the tomatoes, cucumbers, red onions, bagel croutons, cream cheese balls, eggs, scallions, dill, a few pinches of salt and a few turns of pepper. Drizzle with the dressing.

Cook’s Note

Store-bought everything bagel topping will absolutely work; however, some brands are extremely heavy on the salt and should be avoided for this recipe. It’s super easy to make your own everything bagel topping though: Simply combine equal parts dried minced garlic, dried minced onion, poppy seeds and sesame seeds, then add a pinch of kosher salt. You can also add a few pinches of caraway seeds and/or black sesame seeds if you’d like!


Let me know how the recipe turned out for you in the comments below!

Crepes!

“Pancakes were meant to be flipped!”

Anthony T. Hincks
A perfect Saturday morning breakfast.

Five or six years ago I took a class at Sur La Table on how to make crepes, and have been making them ever since. Crepes can be so intimidating if you’ve never made them, but once I learned how easy and forgiving they are, I was never intimidated again.

What I love most about crepes is their versatility. They can be sweet or savory. You can add anything to crepe batter: herbs, chocolate, spices, or keep them plain. Once you’ve made the base, then you can add any ingredients you want to the inside. Versatile.

For this example, I made universal crepes. (These are the two my husband loves) I made plain crepes with strawberries and vanilla bean mascarpone, as well as the tried and true nutella and bananas crepe.

To get started, make the batter. A lot of professional chefs and bakers make their batter in a blender. I don’t have a good blender, so I use a kitchen aid mixer. I recommend using a blender for reasons listed below. After making the batter, make sure to let it rest for 30 minutes. During that time, you can make the fillings.

First things first… make sure the butter is completely melted before adding it to the batter. I made the mistake of throwing two tablespoons in the microwave for :30 seconds, and thinking it was melted, I immediately tossed it in the batter. There was about half of a tablespoon that didn’t melt. The batter was already whisking away in the kitchen aid, so I just kept going. After letting the batter rest, the chunks of un-melted butter rose to the top of the batter. I moved forward, but the dreaded “first pancake” happened. I attempted to flatten the chunks, but then attempted removing the chunks all together. Had I used a blender, it would have smoothed out the batter completely.

Make sure to flip crepes like pancakes. Blintzes don’t have to be flipped, but crepes should be flipped. I use an offset spatula to help raise the crepe and flip it. I’ve seen some kitchen pros use a seafood spatula as well.

After the first “pancake” the rest of the crepes baked out beautifully. I love making crepes on a Saturday or Sunday morning. Sweet or savory, they always fulfill a lazy weekend morning craving. Happy crepe making!


Crepe Recipe

  • Crêpe Batter:
  • 2 large eggs
  • 1 cup whole milk
  • 1/3 cup water
  • 1 cup all-purpose flour
  • 2 tablespoons granulated sugar
  • ¼ teaspoon kosher salt
  • 6 tablespoons unsalted butter, melted and divided, plus more for brushing pan

To prepare crêpe batter: Place eggs, milk, water, flour, 2 tablespoons sugar, salt and 2 tablespoons melted butter in a blender. Blend into a smooth batter with the consistency of heavy cream. If batter is too thick, whisk in additional water 1 tablespoon at a time. Cover and refrigerate for 30 minutes.

Vanilla Bean Mascarpone: mix 1/4 cup of granulated sugar with 8 oz of mascarpone, and 1 teaspoon of vanilla bean paste. Taste the filling, and add 1/4 cup of sugar until it reaches desired sweetness.

To cook crêpes: Heat a 9-inch crêpe pan or high-quality, nonstick skillet over medium-low heat until hot enough for a drop of water to sizzle on contact. Brush the surface of the crêpe pan with a thin film of melted butter using a silicone pastry brush.

Gently stir the batter and ladle ¼ cup into the middle of pan, swirling the batter quickly in all directions to evenly coat the pan with a thin layer of batter. Cook crêpe until the edges turn golden, about 60 to 90 seconds. Gently lift the edge of the crêpe with an offset spatula and quickly flip. Cook the second side until the batter is set, another 30 to 60 seconds.

Transfer the crêpe to a plate and top with a sheet of parchment paper. Repeat with the remaining batter, brushing the pan with more butter, as needed. Stack the crêpes between sheets of parchment to prevent sticking.


Let me know how the recipe turned out for you in the comments below!

Americas Test Kitchen Red Lentil Soup with North African Spices

“For additional heat and spice, serve the soup with harissa, the North African chili sauce.”

KCET
Cooking up the Red Lentil soup.

America’s Test Kitchen is one of the great resources for learning how to cook or bake any recipe. America’s Test Kitchen is also one of the great inspirations for a lot of recipes I’ve never heard of before ATK. I was on their YouTube channel when I stumbled across this video recipe. It looked so easy, that I couldn’t resist cooking it up for a weeknight after a long day at work. I’ve also had red lentils in my cabinet for about a year that I was too intimated to cook. Watching the video helped me to see that I had nothing to be intimated by, and that lentils are a great (and cheap) ingredient. So… I got to cooking! I loved the results as well as my husband. See below for how it went.

In starting this soup recipe, I started with the chopping up the onion, throwing the butter in the dutch oven, and adding the salt. Erin and Julia made a note that adding the salt at this stage was important to help the onions sweat faster and help prevent browning. I then added all of the other spices to the dutch oven to get the aromatics going.

At this point I was thinking this was a small amount of each spice, and that I needed to add more. I did not, I trusted ATK, and I’m glad I did.

Next I added the tomato paste, which is an amazing component for adding umami flavor in vegan or vegetarian dishes. I then moved through the rest of steps and got the water simmering perfectly for the 15 minutes the lentils need to cook and thicken up the soup. Once 15 minutes were up, the lentils had bloomed beautifully and I whisked for 30 seconds (ish) to get the best texture.

I was using a silicone whisk, and ATK was using a stainless steel whisk. Not sure if the material of the whisk changes the texture of the soup, but I liked the texture I ended up with by the end of cooking.

Once I got to the end of the soup recipe, I made the rich sauce out of butter, mint, and paprika. It was delicious, but there wasn’t enough butter, so I added a little more to get the right consistency.

Overall this soup is absolutely delicious and may become a week night staple.


America’s Test Kitchen Recipe

Red Lentil Soup with North African Spices
Serves 4 to 6

  • 4 tablespoons unsalted butter
  • 1 large onion, chopped fine
  • Salt and pepper
  • ¾ teaspoon ground coriander
  • ½ teaspoon ground cumin
  • ¼ teaspoon ground ginger
  • ⅛ teaspoon ground cinnamon
  • Pinch cayenne
  • 1 tablespoon tomato paste
  • 1 garlic clove, minced
  • 4 cups vegetable broth
  • 2 cups water
  • 10 ½ ounces (1 ½ cups) red lentils, picked over and rinsed
  • 2 tablespoons lemon juice, plus extra for seasoning
  • 1 ½ teaspoons dried mint, crumbled
  • 1 teaspoon paprika
  • ¼ cup chopped fresh cilantro

Melt 2 tablespoons butter in large saucepan over medium heat. Add onion and 1 teaspoon salt and cook, stirring occasionally, until softened but not browned, about 5 minutes. Add coriander, cumin, ginger, cinnamon, cayenne, and 1/4 teaspoon pepper and cook until fragrant, about 2 minutes. Stir in tomato paste and garlic and cook for 1 minute. Stir in broth, water, and lentils and bring to simmer. Simmer vigorously, stirring occasionally, until lentils are soft and about half are broken down, about 15 minutes.

Whisk soup vigorously until it is coarsely pureed, about 30 seconds. Stir in lemon juice and season with salt and extra lemon juice to taste. Cover and keep warm. (Soup can be refrigerated for up to 3 days. Thin soup with water, if desired, when reheating.)

Melt remaining 2 tablespoons butter in small skillet. Remove from heat and stir in mint and paprika. Ladle soup into individual bowls, drizzle each portion with 1 teaspoon spiced butter, sprinkle with cilantro, and serve.


Let me know how the recipe turned out for you in the comments below!

Molly Yehs Everything Bagel Bourekas

“They are delicious and perfect for a brunch party!”

Molly Yeh
My now Favorite Everything Bagel Bourekas!

Molly Yeh is without question, my favorite food blogger, cookbook author, and food network personality. Molly’s Chinese-Jewish heritage inspired cooking is my favorite genre of food. I always find her recipes easy to understand, delicious, and inspiring. I was watching the Girl Meets Farm episode where she makes these joyous Bourekas, and immediately knew I had to make them within that same week. I am so happy I did. The Bourekas came out perfect in comparison to Molly’s. They were warm, flaky, packed with flavor, and so filling. Even reheated the next day, these Bourekas held up perfectly.

In starting this Boureka recipe, I took a page from Girl Meets Farm, and added turkey bacon. In Molly’s original recipe she does not call for bacon, but in the tv episode she adds it.

I started the day before by thawing the puff pastry in the refrigerator. I did not have scallion cream cheese on hand but I did have whipped cream cheese and scallions so I mixed them together and made my own. VERY EASY. I then cooked the scrambled eggs, and put the turkey bacon in the oven. Once those ingredients were prepped, I set them aside and cut out the puff pastry into the 6 squares.

I assembled the ingredients together by placing the scallion cream cheese on bottom, followed by torn up pieces of the turkey bacon. Molly recommends placing the bacon in this order of ingredients in order to not tear the dough. After the bacon, I added the scrambled eggs and closed up the pastry. I brushed on the egg wash, and sprinkled the everything bagel seasoning then baked as instructed.

A side note: for the everything bagel seasoning, I bought a bottle from Trader Joe’s. It is sold at Trader Joe’s for $1.99, but you can also buy it on amazon for almost $8… yikes. If there is a Trader Joe’s near you, I recommend buying the seasoning as I imagine it’s a big time saver, and tasted amazing.

The Bourekas came out oven the oven and I immediately knew they were perfect. They taste even better than they look. Molly Yeh’s Everything Bagel Bourekas are such a treat and as she recommended, they would be perfect for a brunch party or breakfast for dinner party. Trial on.


Molly Yeh’S RECIPE

INGREDIENTS

  • 5 large eggs
  • 2 tablespoons chives, chopped
  • 4 ounces shredded whole-milk mozzarella cheese
  • 1 tablespoon unsalted butter
  • Kosher salt and black pepper
  • Tabasco sauce
  • 1 sheet puff pastry, thawed in the refrigerator overnight
  • 6 ounces scallion cream cheese, room temperature (or 6 ounces plain cream cheese mixed with 2 scallions, finely chopped)
  • Ketchup, for serving
  • Everything bagel topping:
  • 1/2 teaspoon dried minced garlic
  • 1/4 teaspoon kosher salt
  • 3/4 teaspoon poppy seeds
  • 1 teaspoon sesame seeds
  • 1/2 teaspoon dried minced onion

INSTRUCTIONS

  1. Preheat oven to 375°F. Line a baking sheet with parchment paper.
  2. In a medium bowl, whisk together 4 eggs until homogenous, then stir in the chives and mozzarella.
  3. In a large skillet, heat the butter over medium heat. Pour the egg mixture into the hot skillet and cook until the bottom is set. Use a spatula to gently pull the bottom cooked parts to the sides of the pan to make space for more of the mixture to cook. Repeat this gentle pulling process one or two more times until a majority of the mixture is set, then transfer to a bowl. The eggs should still be quite wet, as they’ll continue to cook in the oven. Season them with salt and pepper and a few shakes of Tabasco sauce.
  4. On a work surface, roll out the puff pastry to a 10×15-inch rectangle. Cut it into six 5-inch squares. Top each of the squares with a schmear of scallion cream cheese and a spoonful of the scrambled eggs, distributing them evenly and leaving a 3/4-inch border around the edges.
  5. In a small bowl, beat the remaining egg with 1 tablespoon water to make an egg wash. Brush the edges of the puff pastry squares with egg wash, fold them in half, and pinch the edges to seal them well. Transfer to the baking sheet, placing them 1 inch apart.
  6. Combine all ingredients for the everything bagel topping in a small bowl. Brush the tops with egg wash and top with the everything bagel topping. Bake until golden brown. Begin checking for doneness at 30 minutes.
  7. Let cool slightly, and serve with ketchup. Leftovers can be refrigerated and reheated in a toaster oven.

Let me know how the recipe turned out for you in the comments below!

TAQUERIA DEL SOLS FISH TACOS

While yummy, next time, I’ll just eat them at the restaurant.

— Shelby Watson, Trial & Eggs
Shelby’s TDS Fish Taco Trial.

For the people reading this who haven’t been to Atlanta, Athens, nor Nashville, try this recipe out. For people reading this who live in Atlanta, Athens, or Nashville, just go to Taqueria Del Sol and order the fish taco. Let’s review below.

I made these with my father on a Saturday night as part of a big family style meal when my cousin came to visit. We followed all of the instructions and had most of the ingredients, but it was still not the original TDS (as we call it in my family) fish taco.

Why?

  • We used Sole instead of tilapia. I don’t know if this played a role in the disappointment.
  • I made the poblano tartar sauce exactly as requested, except I used a meyer lemon instead of a regular lemon. I was worried the sweeter flavor would change the tartar sauce, it did not. I added two tablespoons which I now see it only called for one. It became way to watery and not much like a sauce.
  • The recipe calls for corn flour, but all I had was corn meal. I believe this played a major role in the results of the fish.
  • There was no creole mustard, so it was not added to the egg wash. I believe the lack of mustard made the fish bland. MAKE SURE TO HAVE THIS.

The corn tortillas were awesome for the tacos, and I grilled a poblano to add a little more crunch to the taco. The pickled jalapeños were a no-brainer and I ended up adding more to my tacos to make up for the bland flavor of the fish.

Eddie Hernandez, did an amazing job developing this recipe, we did not execute the recipe correctly. Small fixes such as not adding too much lemon juice, using corn flour, and making sure to include the creole mustard, would definitely make all of the difference.


TAQUERIA DEL SOL’S RECIPE

Ingredients

Taqueria del Sol’s Poblano Tartar Sauce
1/4 cup diced poblaño pepper
1 small jalapeno, stem removed
2 tablespoons chopped onion
1 cup mayonnaise
1 tablespoon lemon juice
Salt

Taqueria del Sol’s Fish Tacos
1 cup panko bread crumbs
1/2 cup all-purpose flour
1/4 cup maseca (instant corn masa flour)
2 tablespoons cornstarch
1 1/2 teaspoons salt
1/2 cup milk
1 egg
1 1/2 teaspoons Creole mustard
Vegetable oil, for frying
2 pounds tilapia, cut into 1 1/2-inch wide strips
8 (6-inch) flour tortillas
Pickled jalapenos, sliced, for garnish

Instructions

To make the tartar sauce: In the bowl of a food processor, combine the poblano, jalapeño and onion. Pulse until everything is evenly chopped but not minced, about 10 pulses. Transfer the chopped vegetables to a medium bowl. Stir in the mayonnaise and lemon juice and season to taste with salt. The sauce may be refrigerated for up to 1 week.

To make the tacos: In the bowl of a food processor, pulse the panko 5 times until broken into small pieces. Move the panko to a bowl and stir in the flour, maseca, cornstarch and salt. Whisk together until well combined. Pour the mixture into a pie plate and set aside.

In another pie plate, make an egg dip by combining the milk, egg and mustard. Whisk together until well combined. Set aside.

In a large skillet over high heat, add 1/4-inch of vegetable oil.

Dip the fish strips into the egg dip and then roll in the breading. When the oil has reached 350 degrees, carefully arrange the fish strips in the hot oil and cook until crisp and golden on both sides, about 4 minutes per side. Do not crowd the skillet. When fish is cooked, remove to a wire rack or paper towels and let drain. Keep warm and cook the remainder of the fish. Discard any remaining breading and egg wash.

Heat the tortillas for 20 seconds in the microwave. Top each tortilla with two pieces of fish and 1 tablespoon of the poblano tartar sauce. Garnish with sliced pickled jalapeños and serve immediately.


Let me know how the recipe turned out for you in the comments below!

A COZY KITCHENS STRAWBERRY BLACK AND PINK COOKIES

These cookies are just like the classic. They’re more cake-like than cookie-like. They’re soft and moist. And… they taste like strawberries.

— Adrianna Adarme, A Cozy Kitchen
My attempt at Pink & Black cookies.

I made these Strawberry Pink and Black cookies for an office holiday party (pot-luck style). I found the recipe in a newsletter from Taste that contained an ebook on jazzed up holiday cookies from different chefs and bakers. I was so excited to try these cookies because hello, who doesn’t love strawberries and chocolate? I found some things that I loved when making this recipe, and I found some things that I didn’t love. Read on friends.

Let me start with what I found that I loved about this recipe: This recipe calls for fresh strawberries – YAY. Even though I made these in December (two months before strawberry season in the south), the strawberry flavor was vibrant thanks to the method used in this recipe. So, what is the method? Using strawberries that have been hulled and halved. What does it mean to hull and half the strawberries? Cut them in half, and with a paring knife, remove all of the white flesh. The white flesh is full of nutrients, so you can save this bit to eat later, but it is also mostly water. When the strawberries are being emulsified in the food processor at a later stage, the white flesh, if left in, would leave the strawberries to be much more watery causing the flavor to dilute. I’m so excited I now know this technique to use in future recipes.

I followed this recipe exactly and enjoyed spreading the cookie on a cookie sheet with an offset spatula. It was just fun! The cookies came out exactly as expected. The recipe does a great job of keeping the batter directions concise and simple.

The moment I came to a snag was when I started making the glazes. I followed the instructions exactly, but the glazes did come out more like a glaze and less like an icing. Based on the image, I was expecting the strawberry glaze to be smoother, thicker, and fluffier. I’m thinking that maybe when the recipe says to which the batter together, it meant a stand or hand mixer whisk (maybe)?

I also had to triple both of the glaze recipes in order to coat every cookie half and half. I found that the powdered sugar I used was very overwhelming on the glaze and almost tasted more tart that sweet. Not sure if this is due to the brand of powdered sugar, or if it “whisked” incorrectly. The chocolate icing/glaze had a similar problem with the powdered sugar overtaking the actual chocolate flavor and being more runny than creamy icing.

Overall, the cookie definitely had a strawberry flavor, but could have had more if the icing recipe was different. The cookie was soft and enjoyable. I love the idea of this cookie but believe it could taste so much better. If I make this cookie again, I will attempt my own type of icing/glaze that is using the strawberry puree to its fullest extent without over powering it with powdered sugar, as well as maximizing the chocolate flavor in the chocolate icing. Store bought chocolate icing would be a game changer for these cookies. Try the recipe below and let me know what you think!

A Cozy Kitchen’s Recipe

COOKIES:

5 ounces fresh strawberries, hulled and halved
1 2/3 cups all-purpose flour
1/2 teaspoon baking powder
1/2 teaspoon salt
2 large eggs
3/4 cup white granulated sugar
1/4 cup whole milk
6 tablespoons unsalted butter, melted and cooled to room
temperature
1 teaspoon pure vanilla extract

PINK GLAZE
1/2 cup powdered sugar, sifted
1 tablespoon strawberry puree
BLACK GLAZE
1/4 cup powdered sugar
1 tablespoon cocoa powder
1 tablespoon whole milk

DIRECTIONS

  • Preheat the oven to 350°F. Line a baking sheet with parchment paper.
  • Add the strawberries to the bowl of a food processor and pulse until they’re smooth and resemble a watery puree. Using a measuring cup, measure out 1/4 cup of puree. A few tablespoons of the strawberry puree should remain. Transfer it to a small bowl and set it aside to use when making the glaze.
  • In a medium bowl, whisk together the all-purpose flour, baking powder, and salt; set aside.
  • In a large bowl, whisk together the eggs and sugar until smooth. Pour in the strawberry puree and milk, and whisk to combine. Whisk in the melted butter and vanilla extract. Add the flour mixture, and stir to form a smooth dough, being sure not to overmix.
  • Using a 2-ounce cookie dough scoop, drop 5 to 6 cookies per pan, spacing them 3 inches apart. The batter should spread upon hitting the baking sheet; you may need to use an offset spatula or butter knife to flatten the cookie dough slightly until it’s about 1/4 inch thick. Bake the cookies until the edges are light brown and the center is soft, about 12 to 14 minutes. Gently transfer the cookies to a wire rack to cool. Repeat until you’ve worked through all the cookie dough.
  • To make the pink glaze, whisk together 1/2 cup powdered sugar and 1 tablespoon of strawberry puree until smooth and thick.
  • To make the black glaze, whisk together the powdered sugar, cocoa powder, and heavy cream until smooth. Flip over all of the cookies and smear the chocolate on half of each cookie. Ice the remaining half of each cookie with the strawberry frosting, and let the frosting set. Store the cookies in an airtight container.

Let me know how the recipe turned out for you in the comments below!

LMS Chocolate Crinkle Cookies

These are easy to make with a fudgy brownie center and a sweet crunchy exterior.

— Natalie, Life Made Simple
My not so spectacular trial of the Chocolate Crinkle Cookies.

In an effort to make the infamous Chocolate Crinkle Cookies, I searched far and wide (went straight to my cookie monster Pinterest board), and found the Life Made Simple recipe. I immediately gravitated toward the recipe because it was labeled as simple. As you may already be able to tell from the images, I completely failed at making this recipe! Keep reading to see how and why.

Making this recipe did not go well, and it was 100% because of my own mistakes. First mistake I made was a ROOKIE mistake! I did not have enough nor all of the ingredients required to make this recipe. It calls for 1 1/2 cups of granulated sugar, and I only had 1/2 cup to use. Oh the shame… I went ahead with a cup short of sugar.

My next missing puzzle piece was not having espresso powder. I did not have espresso powder, but post-bake I did some research and realized that espresso powder is much more simple than I thought thanks to the Kitchn. During the baking process I brewed a cup of coffee, to make up for the lack of espresso powder . I used three teaspoons of coffee to make up for the lack of espresso (the recipe only calls for 1/4 teaspoon of the espresso powder). I’m not exactly sure how this messed the cookies, but based on the final result, I know it did.

I followed the recipe exactly for the remainder of the instructions and came to my next downfall step: shaping into balls. The cookies would NOT form. They spread flat on the cookie sheet. I immediately scooped out the rest of the dough onto the cookie sheets, then threw them into the freezer in hopes I could reshape before rolling in the powdered sugar. Once I pulled them out of the freezer, I quickly realized that was not a possibility and they stuck to the parchment paper. So, I heavily dusted the cookies with powdered sugar and threw them in the oven. It was not a great end result.

In the end, the cookies lacked sweetness, were cakey, and didn’t hold the cracked powdered sugar form. Needless to say while I failed this time, I plan to test the recipe again, and actually stick to the recipe.

Life Made Simple Recipe

FOR THE DOUGH:

  •  1 1/2 c. granulated sugar
  •  1/2 c. light or dark brown sugar
  •  3/4 c. vegetable or canola oil
  •  2 tsp. vanilla extract
  •  1/4 tsp. espresso powder
  •  4 large eggs
  •  2 1/3 c. all-purpose flour
  •  1 c. unsweetened cocoa powder
  •  2 tsp. baking powder
  •  1/2 tsp. coarse kosher sea salt

FOR ROLLING:

  •  3/4 c. powdered sugar

INSTRUCTIONS

  1. In the bowl of a stand mixer or a large mixing bowl with a hand mixer, add the sugars, oil, vanilla, and espresso powder. Mix on low until combined, about 1 minute. Add eggs one at a time, mixing after each addition.
  2. In a medium mixing bowl whisk together the flour, cocoa powder, baking powder, and salt.
  3. With mixing speed on low, gradually add the dry ingredients, mix until combined.
  4. Cover dough and refrigerate for at least four hours, or overnight.
  5. Once the dough is thoroughly chilled and completely solid, preheat the oven to 350 degrees. Line baking sheets with parchment paper or silicone baking mats.
  6. Using a small cookie scoop (about 2 teaspoons), form balls. Roll in your hands to create a smooth surface on each ball. Roll each ball in powdered sugar, packing it on to ensure it is fully covered.
  7. Place on cookie sheet and bake for 10-13 minutes or until set. The cracks should still look moist, they will firm as the cookies cool. Transfer to a wire rack to cool complete

Let me know how the recipe turned out for you in the comments below!

BA Chocolate Pudding Pie Trial

A dazzling chocolate pudding pie cloaked in voluminous whipped cream.

— Bon Appetit

I came across this pie recipe before Thanksgiving and immediately knew I had to make it for my Friendsgiving. I am not a big fan of the traditional pie recipes that Thanksgiving offers (pumpkin and pecan), and I am a huge fan of chocolate. Big win with this recipe. It was absolutely delicious.

How did making this recipe go? Well, I followed it to a T (mostly), because I needed this to go right if at all possible, and it was delicious (the first pie to disappear)!

I started the recipe with a store bought pie dough that was hanging out in my fridge. I placed it in a pie dish, and stuck it in the oven to blind bake for 25 minutes and completely skipped the pie crust part of the recipe. AND IT FAILED!

Why?

  • I didn’t place a sheet of parchment paper on top with pie weights. This caused the pie dough to shrink drastically and the pie crust only reached 1/2 up the pie dish.
  • I poked holes in the dough with a fork and it became EXTREMELY dry and snapped when broken vs the flaky crust people expect when eating a pie.
  • I also should not have used a store bought pie crust that was two months old. (Whoops!)

SO, I restarted by making the pie dough in a food processor. The recipe didn’t say I should, but I’ve made 100’s of pie crusts in my life, and almost 99% were made in a food processor. I then set up the pie crust in a pie dish, placed down the parchment and pie weights as the recipe requested. I used dried beans for pie weights. I skipped poking the dough with a fork. The result? The pie dough didn’t shrink as much as I thought it would (based on the first crust of the day), so the dough didn’t have the thick scrunched edges. It was mostly flat in the overhang of the crust.

While the pie crust was baking, I started on the filling. I followed the instructions to a T, especially since my first part of this creation had already failed. It came out perfectly! The pudding came out exactly as the image displayed.

For the whipped cream portion of the pie, I decided to skip the direction and go directly to making my own based off of the method I know is tried and true – heavy cream in a stand mixer. But, I didn’t add enough sugar and forgot the vanilla. It was a very bland cream top, but it worked out! The pudding was so sweet that a very sweet whipped cream would have been an overwhelming amount of sugar. I also skipped dusting cocoa powder and went for scattering cocoa nibs across the top instead. Why? Because I like the crunch the nibs add to the silky smooth texture of the pudding and cream.

Overall, this recipe was a success, but I still failed in the process. I love baking!

Bon Appetit’s Chocolate Pudding Pie Recipe

INGREDIENTS

Crust

  • 2 Tbsp. granulated sugar
  • 2 tsp. Diamond Crystal or 1 tsp. Morton kosher salt
  • 2⅔ cups all-purpose flour, plus more for dusting
  • 1½ cups (3 sticks) chilled unsalted butter, cut into ½” pieces

Filling

  • ½ cup sugar
  • 3 Tbsp. unsweetened cocoa powder, preferably Dutch-process
  • 2 Tbsp. cornstarch
  • 2 large eggs
  • 2 large egg yolks
  • 2½ cups whole milk
  • 1 tsp. vanilla extract
  • ½ tsp. kosher salt
  • 4 oz. bittersweet chocolate, chopped

Assembly

  • 1 tsp. unflavored powdered gelatin
  • 2 cups heavy cream
  • 2 Tbsp. sugar
  • 2 tsp. vanilla extract
  • 1 tsp. kosher salt
  • Unsweetened cocoa powder, preferably Dutch-process (for serving; optional)

RECIPE PREPARATION

Crust

  • Whisk sugar, salt, and 2⅔ cups flour in a large bowl. Add butter and, using your fingers, smash each piece into a thin disk. Take your time doing this and don’t feel compelled to break butter into even smaller pieces. Drizzle ⅔ cup ice water over, dispersing it as widely as possible, and mix with a rubber spatula to bring mixture together into a shaggy mass.
  • Turn dough out onto a surface and work together with your hands, pushing and flattening until dough holds together when squeezed in your palm but some streaks of dry flour are still visible. Divide dough into 2 portions.
  • Flatten 1 portion of dough into an 8″-diameter disk. Cut into quarters, stack pieces on top of one another, and flatten dough with a rolling pin to about half of its original height. At this point dough should hold together with no dry spots remaining, and have nice big flakes of butter showing. Use a bench scraper or a large knife to clean any clingy bits of dough from surface. Dust surface with flour, then dust top of dough with flour. Roll out to a ¼”–⅜”-thick round. Wrap dough around rolling pin and transfer to a standard 9″-diameter pie dish. Unfurl into dish, then lift edges and allow dough to slump down into dish. Trim overhang to an even 1″ (there will be some excess). Fold overhang under and crimp as desired. Cover and chill until very cold, at least 1 hour and up to 12 hours (cover tightly if chilling longer than 1 hour). Repeat process with remaining dough and another pie dish. Or form into a 1½”-thick disk, wrap in plastic, and chill up to 3 days (or freeze up to 1 month).
  • Place a rack in middle of oven; preheat oven to 400°. Lay 2 sheets of parchment paper over dough and fill with pie weights or dried beans (they should fill the dish). Set on a foil-lined rimmed baking sheet (this will keep any butter drips from smoking up your oven). Bake until edges are golden brown and bottom is opaque (carefully lift parchment to check), 30–35 minutes. Remove from oven; reduce oven temperature to 300°. Lift out parchment and weights. Bake crust until evenly chestnut brown all over, 10–15 minutes. If baking both crusts, turn oven dial back up to 400° and let oven preheat; repeat with remaining crust.

Filling

  • Whisk sugar, cocoa powder, and cornstarch in a large saucepan to combine. Add eggs and egg yolks and whisk vigorously, making sure to get into corners of pan, until smooth. Whisk in milk, vanilla, and salt.
  • Place saucepan over medium heat and bring to a simmer, whisking often and making sure to get into corners of pan, 8–10 minutes (mixture should be bubbling and thickened). Reduce heat and continue to simmer, whisking constantly, 3 minutes. Remove from heat and let pudding cool 5 minutes, whisking several revolutions every minute to prevent any skin from forming.
  • Add chocolate to pudding and whisk until melted and fully incorporated. Scrape filling into pie crust; smooth surface. Chill until cold and set, at least 2 hours and up to 3 days.

Assembly

  • Stir gelatin and 1 Tbsp. water in a small bowl. Let sit until solidified, about 5 minutes. Microwave in 5-second intervals until melted, or set in a bowl of very hot water and let sit until melted.
  • Using an electric mixer, beat cream, sugar, vanilla, and salt in a large bowl until soft peaks form. Add melted gelatin and beat until medium peaks form. Spoon whipped cream over filling, swirling as desired. Chill until set, about 1 hour. Dust with cocoa powder if desired.
  • Do Ahead: Pie can be made 3 days ahead. Keep chilled.

Let me know how the recipe turned out for you in the comments below!

Design a site like this with WordPress.com
Get started